Categories
Categories
- Home
- Candy Tutorials-Recipes - Free
Candy Tutorials-Recipes - Free
Get Free Cake Decorating Newsletter & Specials!
Free Candy Making Tutorials‚ and how to use your candy making supplies.
Making Hard Candy
Hard Candy Recipe & Molding Instructions--Using Sugar
Hard Candy Recipe & Molding Instructions--Using Isomalt
Using Candy Coating
Melting Candy Coating
Adding Color
Adding Flavor
Using Candy Molds--With Chocolate/Candy Coating
Clean-up
Storage
Modeling Chocolate-Candy Clay
Modeling Chocolate-Candy Clay Recipe & Instructions
Melting Candy Coating
Four Easy Methods
Because you're starting with candy coating (instead of real chocolate, which requires tempering), you can use several easy ways to melt to a perfect smooth texture
for molding. Candy Melts are also known as confectionery coating or summer coating. They are convenient wafers made of sugar, milk solids, vegetable oils, flavorings
and colors. The Light Cocoa, Dark Cocoa and Dark Cocoa Mint-flavored Candy Melts also contain cocoa powder. Candy Melts taste delicious, but don't require the careful melting procedures of chocolate.
Before you begin, make sure all of your utensils are dry. Water causes melted coatings to harden and streak. Melted Candy Melts are ready for molding when the texture resembles cooked pudding. For all methods, do not overheat by melting on too high a setting or for too long. Coating loses its proper consistency if overheated or if liquids are added. If coating becomes too thick, add 2 teaspoons of hydrogenated solid vegetable shortening per 14 oz. of Candy Melts.

1. Microwave Oven: Convenient Melting
A quick and easy way to melt candy in a microwave-safe bowl, spouted measuring cups, a squeeze bottle or disposable decorating bags.
If you're using a bowl or measuring cup, microwave 1 package candy caoting at 40% power or defrost setting for 1 minute. Stir thoroughly. Continue to microwave and stir at 30-second intervals until smooth and completely melted. By using bags or the Melting Bottle, you can squeeze the candy right into the mold for less mess.

If you're using a disposable bag, microwave as described above, squeezing bag between heating intervals to blend candy wafers together. When completely melted, snip off end
of bag and squeeze melted candy into molds. Throw away bag when empty.

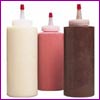
If you're using squeeze bottles, fill bottle half full with candy coating and microwave at 40% power or defrost setting for a minute, knead gently to mix and continue melting at 15-second intervals until candy is completely melted and smooth. When melted, twist lid on bottle and squeeze candy right into molds.

2. Double Boiler: Easy Melting
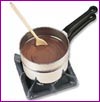
Fill lower pan with water to below level of top pan. Heat water to a simmer, then remove from heat. Put candy coating in top pan and set in position on lower pan. Stir constantly, without beating, until smooth and completely melted.

3. Slow Cooker: For Large Quantities
Ideal for melting large amounts of candy (3 1/2 to 5 lbs.).
Note: Do not melt less than 3 1/2 lbs.
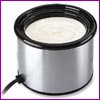
Place 1 package of Candy Melts into a slow cooker and set on low. Never use a higher setting. Stir occasionally as it melts. When almost completely melted (about 20 minutes), add
another package. Stir occasionally again until almost completely melted, then add another package of Candy Melts. Repeat procedure until you've melted as much candy as you need. You can melt up to 5 lbs. of Candy Melts in your slow cooker (total melting time for 5 lbs. is about 45 minutes).

4. Warming Tray: For Melting More Than One Color
Place different colors of candy coating in oven-safe glass bowls or custard cups. Position bowls on tray on a low to medium setting, stir while melting. Left on the low setting, the tray will keep your assorted Candy Melts colors at the ideal melted texture while you are molding.
Candy Coloring
Turn white candy coating into virtually any color using oil-based candy colors. Candy coloring is a great way to change shades or to achieve cool custom colors.
To Color:
For candy coloring, add oil-based colors to melted candy coating a little at a time. Mix thoroughly before adding more color. Colors tend to deepen as they're
mixed. Pastel colored candies are most appetizing, so keep this in mind when tinting.
Candy Flavoring
The creamy, rich taste of candy coatings can be enhanced by adding oil-based candy flavors.
To Flavor:
Add approximately 1/4 teaspoon oil-based Candy Flavor to 1 lb. of melted candy coating. Never use alcohol based flavorings; they will cause coatings to harden.
Using Candy Molds--With Chocolate/Candy Coating
If you have melted the candy in a squeeze bottle or decorating bag, use the bottle or bag to add enough melted candy to the cavity(s) of the mold to fill to the desired level. If using another melting method, use a teaspoon to transfer the melted candy to the mold. Once the cavity(s) is filled as desired, hold the mold flat and tap the mold several times onto a solid surface to remove any air bubbles in the candy. Place the mold in the freeze and leave until candy is firm (usually 5-10 minutes). Place a towel or paper towels on your work surface. Remove the candy from the freezer and turn over the mold onto the toweled work surface to release the molded candy.
Hint: When handling molded candy, use white cotton gloves to prevent fingerprints.
After you finish making candy, wash your candy molds in warm water and dry thoroughly with a soft cloth. Don't use soap or detergent â€â€œ they can eventually cause molds to dry out and crack. Never boil your molds or place them in the dishwasher. Molds can last for years if you store them the right wayâ€Â¦keep them flat to prevent warping and place tissues between stacked molds to prevent scratches.
Storage
Making candy for a special occasion or holiday? Save time by making it in advance. Molded candy will stay fresh for 2 to 3 weeks. To store safely, pack candy in airtight containers and keep at room temperature. It is not necessary to refrigerate or freeze your molded candy.
Portions of the above text and images courtesy of Wilton
Industries, Inc. Used with permission.
![]()
Making Hard Candy--Using Sugar
Stovetop Method
Equipment Required
1 qt. saucepan
Pastry brush
Measuring cup
Candy Thermometer that registers to 300°
F.
Wooden spoon
Hot Mitts/Pads
Hard Candy Molds
A Candy Funnel may also be helpful
Hard Candy Recipe--Stovetop
1 c. sugar
1/3 c. hot water
1/3 c. light corn syrup
Liquid food color as desired
Liquid flavoring as desired (candy flavoring works best)
NOTE: Cooked candy is VERY HOT. Caution is necessary to prevent burns. Wear and use protective mitts, gloves, etc.
Spray molds with vegetable oil spray.
Combine sugar, hot water, and corn syrup in saucepan.
Cook over medium-high heat and stir with a wooden spoon until sugar is dissolved.
With a pastry brush dipped in hot water, wash down sides of pan to prevent candy from crystallizing.
Clip thermometer to side of pan and continue cooking.
Wash down sides of pan once or twice more if necessary.
When thermometer registers 300° F, carefully remove pan from heat.
Cooking time is approximately 10 minutes.
Let candy set until bubbles disappear (approximately 2 minutes).
Add flavoring (1/2 tsp. regular liquid flavoring or just a few drops of candy flavoring) and liquid food color if desired.
Use Candy Funnel or pour candy into prepared molds and add sucker sticks if needed.
Let harden about 10 minutes.
When candy is hardened, unmold by inverting onto wax paper.
Let cook completely.
If the weather is humid, wrap cooled candies in sucker bags immediately.
Microwave Method
Equipment Required
microwave-safe container
Pastry brush
Measuring cup
Candy Thermometer that registers to 300°
F.
Wooden spoon
Hot Mitts/Pads
Hard Candy Molds
A Candy Funnel may also be helpful
Hard Candy Recipe--Microwave
1/2 c. sugar
1/2 c. light corn syrup
Liquid food color as desired
Liquid flavoring as desired (candy flavoring works best)
NOTE: Cooked candy is VERY HOT. Caution is necessary to prevent burns. Wear and use protective mitts, gloves, etc.
Spray molds with vegetable oil spray.
Combine sugar and corn syrup in microwave safe container that has extra space for boiling water.
Cook at high power for 6 1/2 minutes‚ stirring occasionally with a wooden spoon until sugar is
dissolved.
Also during cooking time, use a pastry brush dipped in hot water to wash down sides of container to prevent candy
from crystallizing.
When thermometer registers 300° F, carefully remove from microwave.
Cooking time is approximately 6 1/2 minutes.
Let candy set until bubbles disappear (approximately 2 minutes).
Add flavoring (1/2 tsp. regular liquid flavoring or just a few drops of candy flavoring) and liquid food color if desired.
Use Candy Funnel or pour candy into prepared molds and add sucker sticks if needed.
Let harden about 10 minutes.
When candy is hardened, unmold by inverting onto wax paper.
Let cook completely.
If the weather is humid, wrap cooled candies in sucker bags immediately.
Making Hard Candy--Using Isomalt
Tips For Keeping Cooked Isomalt as Clear As Possible
DO NOT OVERCOOK.
Use Stovetop Method--You can monitor the temperature better.
Make A Large Batch--Using at least 3 lb. isomalt crystals. The temperature will not change as quickly in a large batch.
Stop cooking isomalt at 336 F--It will continue to cook for a short time.
Place pan in ice-water bath when 336 F temperature is reached to quickly stop rising temperature.
Use Distilled Water.
Use stainless-steel pan and stirring spoon.
Use nylon-bristle pastry brush (some natural bristle brushes may bleed color).
Stovetop Method
Equipment Required
1 qt. saucepan
Pastry brush
Measuring cup
Candy Thermometer that registers to 338° F.
Wooden spoon
Hot Mitts/Pads
Hard Candy Molds
A Candy Funnel may also be helpful
Hard Candy Recipe Using Isomalt
1 c. isomalt (there are approximately 2 c. isomalt crystals per 1 lb. bag)
4 T. hot water
Liquid food color as desired
Liquid flavoring as desired (candy
flavoring works best)
NOTE: Cooked isomalt is VERY HOT. Caution is necessary to prevent burns. Wear
and use protective mitts, gloves, etc.
Spray molds with vegetable oil spray.
Combine isomalt and water in saucepan. The damp isomalt should look similar to wet sand.
Cook over medium-high heat and stir with a stainless-steel spoon until sugar is
dissolved.
With a pastry brush dipped in hot water, wash down sides of pan to prevent candy
from crystallizing.
Clip thermometer to side of pan and continue cooking.
Wash down sides of pan once or twice more if necessary.
When thermometer registers 338° F, carefully remove pan from heat.
Cooking time is approximately 10 minutes.
Let candy set until bubbles disappear (approximately 2 minutes).
Add flavoring (1/2 tsp. regular liquid flavoring or just a few drops of candy flavoring) and liquid food color if desired.
Use Candy Funnel or pour candy into prepared molds and add sucker sticks if needed.
Let harden about 10 minutes.
When candy is hardened, unmold by inverting onto wax paper.
Let cook completely.
If the weather is humid, wrap cooled candies in sucker bags immediately.
Hard Candy Recipe Using Isomalt--Microwave Method
1/2 c. isomalt (there are approximately 2 c. isomalt crystals per 1 lb. bag)
2 T. hot water (this will make isomalt crystals look similar to wet sand)
Liquid food color as desired
Liquid flavoring as desired (candy
flavoring works best)
NOTE: Cooked isomalt is VERY HOT. Caution is necessary to prevent burns. Wear
and use protective mitts, gloves, etc.
Spray molds with vegetable oil spray.
Combine isomalt and water in microwave-safe container that has extra space for boiling water. The damp isomalt should look similar to wet sand.
Cook on high power for 2 minutes and stir with a wooden spoon until isomalt is
dissolved.
Cook on high power an additional 15-30 seconds until temperatuare reaches 338°
F.
Let candy set until bubbles disappear (approximately 2 minutes).
Add flavoring (1/2 tsp. regular liquid flavoring or just a few drops of candy
flavoring) and liquid food color if desired.
Use Candy Funnel or pour candy into
prepared molds and add sucker sticks if needed.
Let harden about 15 minutes.
When candy is hardened, unmold by inverting onto wax paper.
Let cook completely.
If the weather is humid, wrap cooled candies in sucker bags immediately.
Modeling Chocolate-Candy Clay Recipe & Instructions
1 lb. candy coating
1/3 cup light corn syrup
Directions
Melt candy wafers following package directions. Add corn syrup and stir until blended. Pour mixture onto waxed paper. Cover loosely with more wax paper and let set at room temperature overnight. Wrap well and store in airtight container at room temperature until needed.
To Color
Candy Clay may be colored using candy or paste/gel icing oil-based food color (do not use liquid color). Knead in color until well blended.
Usage
Candy Clay will be very firm when first using it. Knead a small amount at a time until workable. If Candy Clay gets too soft, set aside or refrigerate briefly. To prevent candy clay from sticking to work surface, sprinkle work surface with cornstarch (or cocoa for chocolate candy clay). Roll or form to desired shape.
Storage
Prepared Candy Clay will last for several weeks at room temperature in a well-sealed container.
 Loading... Please wait...
